BIKINI BOTTOM SIZING
In the 1970s, no one believed in this existence of hips. But the 1970s definitely believed in bikinis, and holy shit are there some cute options to crochet:
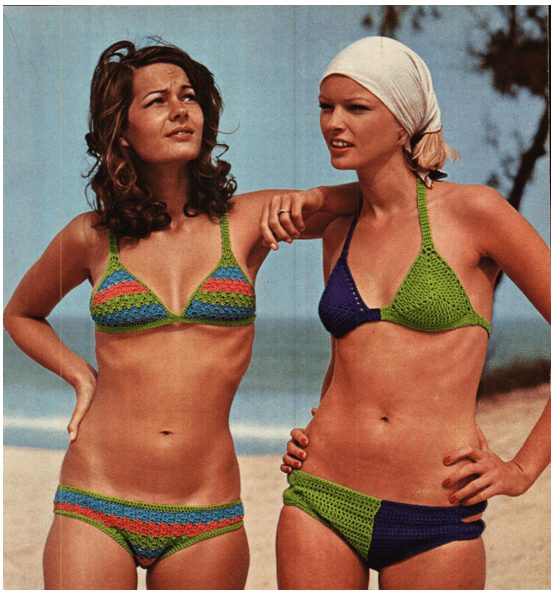
(Pattern available here)
However, if you are like me and have the audacity to have a noticeable size difference between your waist and your ass, 1970s bikini bottom patterns look impossibly small.
But never fear! It’s actually pretty easy to size up to a size that’ll fit. Here’s how to do it:
Step 1: Get a good measurement on your hips.
You want the widest part of your hips, and you want it comfortable but snug. For this example, we’ll use my hip measurement, which is 44 inches.
Step 2: Look at the measurements provided in the pattern.
They may just be written down, but you might have a schematic like this one:
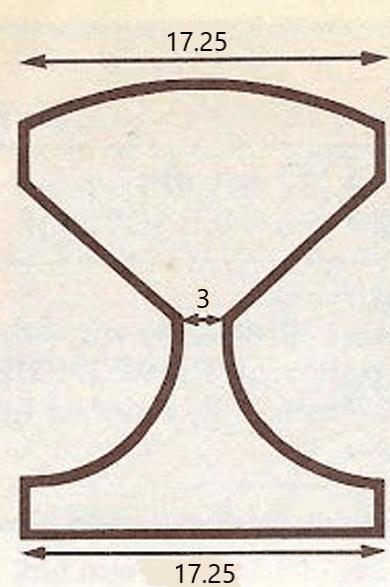
This is showing the back, gusset (crotch), and front width of the bikini bottom. It’s the number at the back we’re most interested in, but we’ll need all three.
Step 3: Take your hip measurement, and subtract the front width.
As I said, we’ll use my hip measurement as a guide:
44 inches (full hip) – 17.25 inches (front width) = 26.75 inches
This tells me how many inches I need to work the back to at its widest point so that these bottoms will fit. As we can see, the back is also 17.25 inches wide. So, let’s subtract the leftover hip measurement to find out how much wider it needs to be:
26.75 (leftover hip measurement) – 17.25 = 9.5 inches
Got that. Let’s do some more math!
Step 4: Adding the extra stitches.
Now that I know I need another 9.5 inches added to the back of the bottoms so they’ll fit, I need to figure out WHERE to put those extra stiches. First off, I need to know my stitches per inch. Let’s say it’s 6. That’s a fairly common stitches per inch with these suits.
6 stitches per inch X 26.75 inches (total inches needed) = 160.5 stitches
Since this came out to a half-number, I’m going to round down to the nearest stitch, which is 160.
So, 160 stitches at the widest part of the back. Got it.
Step 5: Check how the bottoms are made.
Bottoms tend to be made in one of two ways: Either you make a single piece of fabric that you sew up the sides when complete, or you make a front and a back–one of which will include the gusset, and then sew them together at the end.
If the bottoms are worked in one piece from the front, you’ll start increases in the same place as the back increases start according to the pattern, you’ll just be adding more stitches.
If the bottoms are worked one piece from the back, you’ll start decreases in the same place as the back decreases towards the gusset, but you’ll be decreasing more stitches.
If the bottoms are worked in two pieces, you’ll either start at the bottom of the back and work upwards (increasing) or work from the top of the back downwards (decreasing).
The gusset measurement is important when you’re making the bottoms in one piece or when the gusset is attached to the back because you need that measurement to stay the same so the fit between the legs is correct. Always double check your gusset measurements carefully.
The trick to increasing or decreasing is putting those extra stitches where they’ll fit best. The increases and decreases on bathing suits tend to happen right on the edge of the leg hole, and as you’ll be working over the curve of your hips, it’s easy and usually doable to just add those increases or decreases next to the original ones.
However, if you need more than 2 or 3 stitches either way per row, find the center of the work and add or subtract stitches from there as well. This will help keep your legholes properly sized and also cause less curving right at the edges, which can get unruly.
Step 6: More math!
Okay, we know the number of stitches we need (160). We know how many stitches to an inch (6). We know how the bottoms are made. Now, how many rows are actually used to create the back of the bottoms, and of those rows, how many already include increases?
It’s possible you can work all of your increases into the rows you already have. If you have 20 rows to work, and each row gets two increases for the sizes in the pattern, and you know you need two more increases per row to get the width you need, just add those increases next to the others.
If you need noticeably more increases than the row calls for, space those increases out for a smoother look. If you need seven increases per row and the pattern only calls for two, you can do two on each end three in the center. This will get all your increases in without bunching a lot of stitches all together at the start.
The same goes for decreases.
Step 6 is really more suggestions than hard and fast explanation. It’s that way because a lot of how you add sizing in a pattern is determined by how the pattern does it in the first place. Where you can match what’s happening, do it. If you want to make the bottoms a little taller, work extra stitches into those rows as well. This is all just meant to give you a walkthrough of how to get started in making things fit.
Also, don’t be afraid to split your measurement over the front and the back if you want! I have more ass than belly, so it’s easiest for me to just add to the back where I’m curvier. If you have more belly than ass, flip the script and leave the back alone and add the extra stitches to the front. It’ll get you a more comfortable fit, most likely.
Anyway. Go forth! Do math! Look cute! If you want to see how a sized-up pattern looks on me, here’s a video where I talk about it!
