The video gives you a basic overview of the look; here’s some more details to give you a hand making your own tee:
To begin a filet crochet project, you will need a chain that is a multiple of 3. For this shirt, work a chain until it is half the size of the widest part of your torso, then add stitches to make a multiple of 3 if needed.
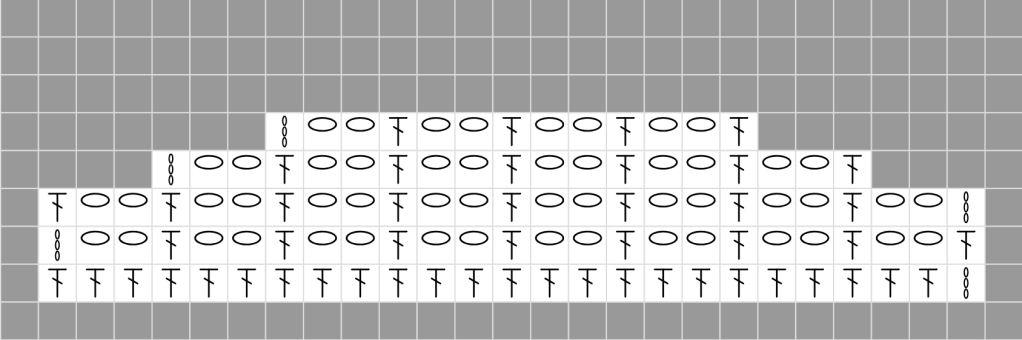
To begin the filet pattern, skip 5 chains and DC in the next chain. Chain 2. *Skip 2 chains. DC in the next chain.* Repeat * across.
To start the second row and all other rows, chain 5 and skip the first DC and first 2 chains. DC in the next DC. *Ch 2. DC in the next DC.* Repeat * across.
Alternate row start: Ch 1. Complete an Extended Single Crochet (ESC) in the first DC. *Ch 2. DC in the next DC* Repeat * across.
To decrease: Fasten off last full row. Join yarn in a double crochet. Chain 5 (or complete an ESC and 2 chains). filet across, stopping the same distance from the end that you started from (for example, if you skipped 3 squares at the start, do not complete the last three squares at the far end).
Make the front and back the same.
For sleeves: Math! Make a chain wide enough to fit around your arm comfortably that is also a multiple of 3 (when it doubt, go up stitches to meet the multiple of 3). Divide that number by 3 to figure out how many squares you will make. You will need enough squares that the final number after decreasing will still fit over your shoulder while also matching the number of decreases made on the front and back.
To decrease sleeves: Do the same as to decrease the front and back.
Sew front and back together up to armhole. Match up decreased rows between the front, back, and sleeves. Sew into place.
