That is not clickbait. I got really into the surface crochet part of making this baby blanket and absolutely wrecked my left elbow, bicep, shoulder, and some spot sort of near my shoulder.
This is not my first crochet injury. It’s healing fine. Take breaks. Stretch. Learn from my (painful) mistakes.
But, I mean, look at it!
It’s worked back and forth over a chain stitch with six increases at the top edge every row. I then used surface crochet to add the extra colors in the stripes, the flower stems, and the name. I embroidered the flowers and worked a series of shells over the edge to finish it off. The goal was to create a blanket that looks like a drawing a kid might create.
For further details plus some info on how I goofed up sewing on the back fabric, here’s a video:
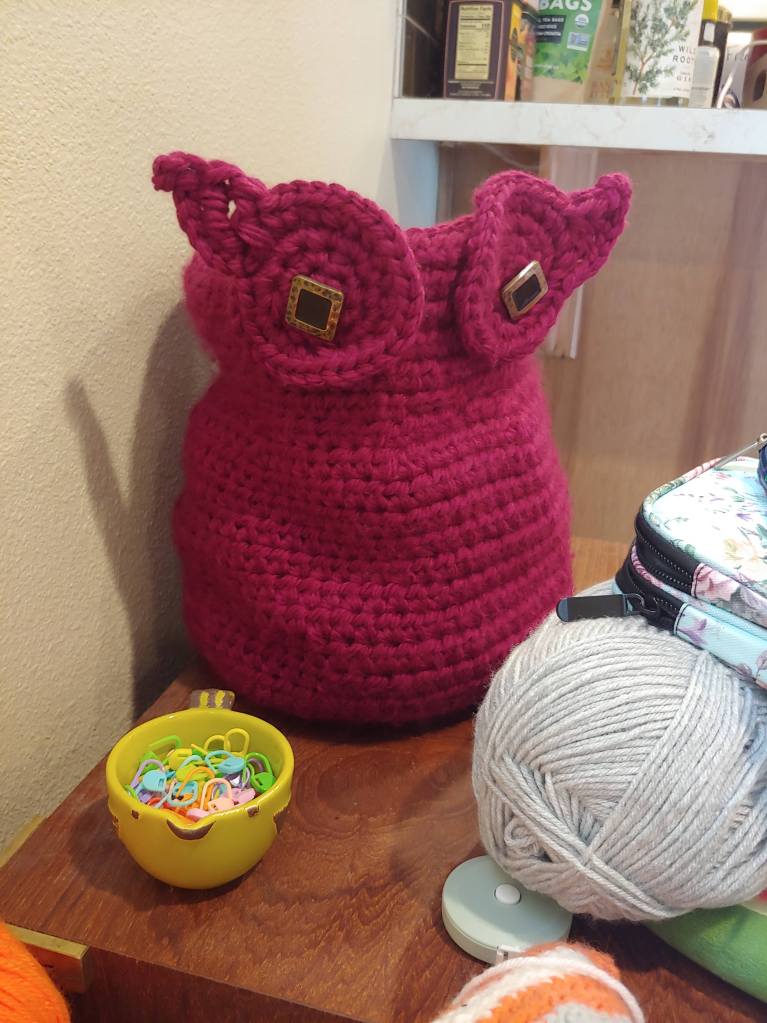
After many years of looking at Deja Joy’s Owl Crochet Basket, I finally sat down and made one. It’s not as firm as the ones in the pattern photos because I didn’t do the quadruple yarn strand that was recommended (my fingers would have snapped clean off), but I am very pleased with my squishy work.
Deja Joy also has a hanging basket pattern that I used to fake some storage in our apartment, and it’s also grand.
Here’s a short video about the owl, just sort of walking you through how it looks and feels:
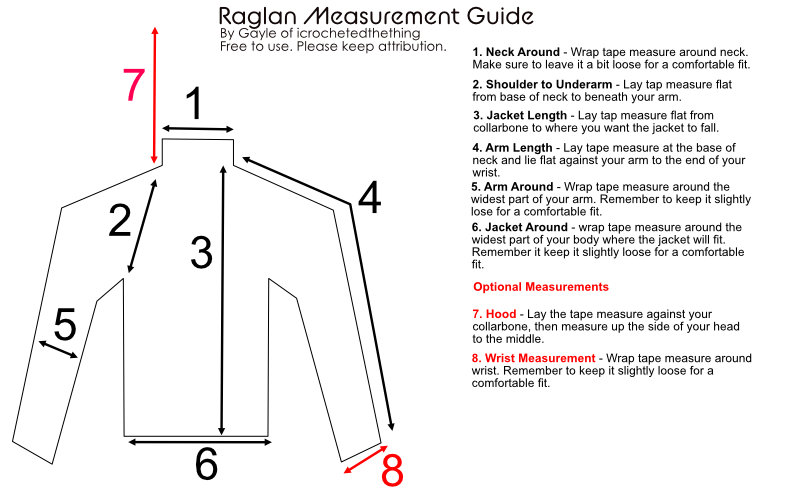
I make a lot of raglan sweaters. Most notably, I’ve made a lot of Captain Marvel sweaters. 5 of them, to be exact. And only once for myself. In order to help me stitch correctly, I’ve got to get measurements, and sometimes the people I need them from are not close enough to go do it myself.
So, I made a little chart that I send to clients. They measure themselves, send me the numbers, and boom. Jacket. I am three for three on the fit (the fourth person lived close enough I got the measurements myself.)
I first made this schematic years ago, and while it included Measurement #7, it did not include Measurement #8. Measurement #8 is important if you want to taper the sleeve on your sweater. It works like this:
Take Measurement #4 and halve it. This will give you the starting point on decreasing for the taper.
Take Measurement #5 and subtract Measurement #8. This will tell you how many inches you need to decrease around.
Check your gauge so you know your stitches per inch, then do a bit more math to figure out how many stitches per round you need to decrease down to Measurement #8 before you finish the sleeve.
I recommend doing decreases every third row for a nice, even taper that can give you a little wiggle room. I also do my decreases on either side of the seam on the back. That keeps the taper looking clean and also makes it easier to count out where the second set needs to go. If you are decreasing 6 stitches every round, you’ll decrease 3 times at the start of the round, and then 3 times at the end of the round, for example.
If you wanna hear me talk a bit about the overall process of making a raglan, here’s a video of the latest Captain Marvel sweater. It includes some extra stuff about the detailing as well: